Hello everybody, welcome to our recipe site, If you're looking for new recipes to try this weekend, look no further! We provide you only the best My Grandmother's DIY Udon Noodles recipe here. We also have wide variety of recipes to try.
Before you jump to My Grandmother's DIY Udon Noodles recipe, you may want to read this short interesting healthy tips about The Foods You Choose To Eat Will Effect Your Health.
The one thing that some of you may already understand is that by consuming the right foods can have a huge effect on your health. One of the foods you should be avoiding is any foods you get at a fast food spot. These types of foods are loaded with bad fat and also have hardly any nutritional value. That is why we are going to be going over the foods that you should be ingesting that will have a beneficial effect on your health.
Even though some of you love to have your snack foods, rather than reaching for the chips try grabbing some nuts. One of many health benefits of these nuts and seeds will be the Omega-3 and Omega-6 that can be present in them. These kinds of fatty acids are vital to helping your body produce the proper quantities of hormones your body needs for a healthy lifestyle. One thing you may not comprehend is that a variety of hormones that you need will only be able to be developed when you have these fatty acids.
If you decide that your health is important to you, you ought to take these recommendations to heart. Also if you remove all the unhealthy food that you really should not be eating anyway, you will probably find that you could end up living a longer life.
We hope you got benefit from reading it, now let's go back to my grandmother's diy udon noodles recipe. To make my grandmother's diy udon noodles you only need 4 ingredients and 22 steps. Here is how you cook that.
The ingredients needed to prepare My Grandmother's DIY Udon Noodles:
- You need 200 grams of White flour.
- Prepare 2 tsp of Salt.
- Take 75 ml of Water.
- Use 1 of Flour for dusting (flour or katakuriko).
Steps to make My Grandmother's DIY Udon Noodles:
- Combine the flour and salt in a bowl. Add half the quantity of water..
- Mix the flour that has been saturated with water in the center of the bowl. Gradually add water and mix into the center so that the mixture takes on the appearance of panko..
- Squeeze and knead the fine crumbs together to form a lump. Add water if necessary, but not too much..
- It will eventually form into a cohesive ball..
- Put in a plastic bag and knead with your feet. This adds elasticity and gives a chewy texture to the noodles! It is possible to mix with your hands, if you put enough strength into it..
- The dough will spread out as you knead, so bring the dough together from time to time and knead for 10 minutes (as seen in the photo, I kneaded the dough by folding it in, and peeled off the plastic each time)..
- Roll the dough into a ball. Wrap in plastic wrap or leave it in the bag, and let rest for over an hour (leave it as is)..
- Since it's already in the bag, flatten the dough with your hands and spread it out slightly..
- Leave the dough in the plastic bag and roll out with a rolling pin, Wrinkle marks from the plastic may transfer to the dough, so peel it off occasionally (I rolled out the dough to the size of the bag)..
- Remove from the bag. Dust your work surface, the rolling pin, and the udon dough with flour using your hands and rub in (I used wheat flour this time). As my cutting board is small, I spread out the plastic bag and lay it on top of it..
- Roll out the dough on your work space. Dust your workspace, rolling pin, and the dough with flour well so that they don't stick. Wrap the dough around the rolling pin, flip it over, and spread the dough out evenly to the four corners (it's easy to turn the dough over if you roll it around a rolling pin)..
- I rolled out the dough to the size of the bag. My cutting board and rolling pin are small, but I was able to roll it out into a long oval..
- When the dough is rolled out to your preferred thickness, fold into three or four, and slice from the edge with a knife (I folded into three)..
- Sprinkle flour on the cut strips and loosen them apart (the cut edges are prone to sticking, so be careful)..
- All the noodles have been cut. While cutting, I started making them a bit fatter so the thickness of the noodles varies somewhat. When they're boiled you'll notice the difference, so please try to keep them to a uniform thickness..
- In a pot, bring plenty of water to the boil..
- Drop the loosened strands into the boiling water. Keep the pot boiling and stir occasionally so the strands don't stick (I only have a small pot, but it's best to use a large one)..
- If the pot looks like it's about to boil over, add 50 ml of water. It'll prevent the pot from boiling over, but it'll also decrease the temperature of the water, so don't add too much! You could also lower the heat..
- Boil the noodles for 8-10 minutes, and once the strands float to the surface, bite into one to check the texture. If it has cooked through, they're done..
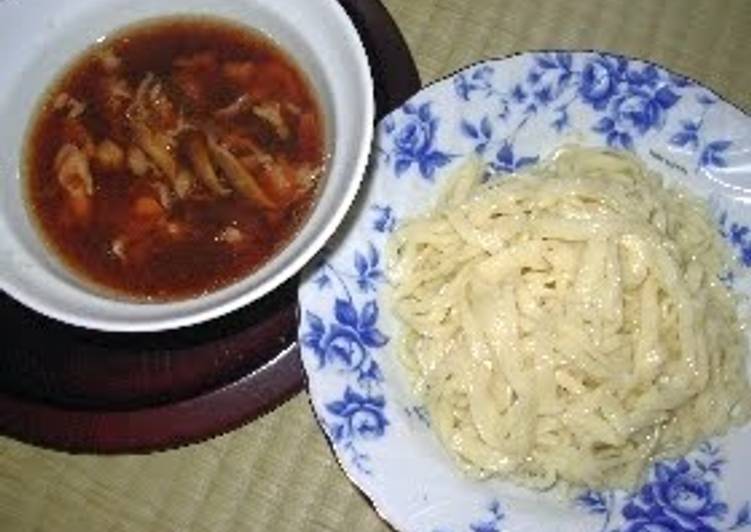
- You could drain the water and wash in cold water for chilled noodles, or serve the noodles in a hot broth. Serve whichever you prefer (I ate the noodles cold)..
- I made the noodles for the first time in a while and cut the strands thickly, but they took forever to boil and were difficult to eat. They were delicious, but my jaws were exhausted from the chewing..
- My father gave me a kneading bowl, and so I made these this weekend. FYI, I made the noodles with 850 g of all-purpose flour. The bowl is pretty big..
If you find this My Grandmother's DIY Udon Noodles recipe useful please share it to your good friends or family, thank you and good luck.


